Last updated: November 03, 2026
Quick answer: Needlework stitches and technique — The Complete Guide starts with 8 core stitches, and 3 of them do most of the early work: running stitch, backstitch, and split stitch. If the question is “which stitch should I use, and how do I stop ruining the fabric while I learn?”, this guide answers that directly: start with a few foundational stitches, match the stitch to the job, and control tension before chasing speed.
I write from long practice with textile technique, pattern reading, and stitch structure, not from pretending every stitch behaves the same in every fiber. In Needlework stitches and technique — The Complete Guide, the main mistake beginners make is treating “needlework” as one skill; if a project has medical, conservation, or high-wear requirements, consult a professional. Needlework stitches and technique are really a set of small decisions: thread, needle, ground fabric, stitch length, and how much strain the finished piece must handle.
Key takeaways
- The right stitch depends on the job: join, outline, fill, decorate, or finish an edge.
- Tension matters as much as the stitch name. A perfect stem stitch can still distort linen if pulled too hard.
- A few stitches cover most beginner projects: running stitch, backstitch, split stitch, stem stitch, satin stitch, whipstitch, blanket stitch, and chain stitch.
- Decorative stitches and structural stitches are not interchangeable. A pretty stitch is not always a strong one.
- Start on stable fabric with visible weave, then move to finer cloth after your hands learn the rhythm.
- If a project will be washed, worn, or handled a lot, choose durable stitch forms and thread that tolerate abrasion.
- The best technique is the one that matches the fabric, the thread, and the amount of stress the piece will see.
What needlework stitches actually do
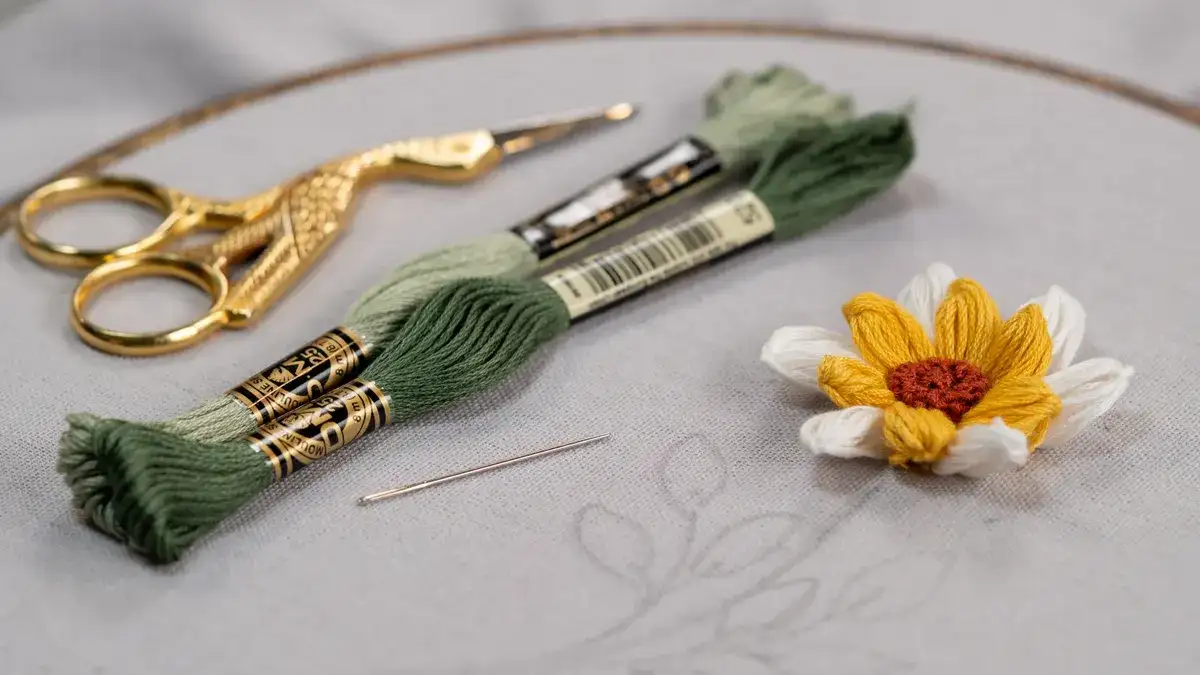
Needlework stitches and technique do one of five jobs: secure seams, hold layers together, shape an outline, fill a surface, or finish an edge. For medical, conservation, or safety-critical repairs, consult a professional or an authoritative guide before you choose a stitch. That sounds simple, but the function matters more than the name on a chart. A stitch that looks elegant on a sampler may be the wrong choice for a hem, a patch, or a monogram on linen.
The cleanest way to think about stitches is by structure. Some stitches travel forward in short bites, like running stitch. Some lock the thread on the return path, like backstitch. Some wrap or overlay previous thread to build texture, like stem stitch, chain stitch, and couching. Some lay long smooth spans across an area, like satin stitch. Others bind a raw edge so it does not fray, like blanket stitch and whipstitch.
For a beginner, the real question is not “What is the fanciest stitch?” It is “What does this fabric need?” A wool felt badge can handle a chunky outline stitch. A fine blouse collar needs a flatter, denser finish. A child’s toy seam needs strength before beauty. Once that decision is clear, the stitch choice gets easier.
One useful rule: if the stitch will carry load, use a stitch that interlocks or overlaps itself. If the stitch is mostly visual, you can prioritize line quality and surface texture. That distinction keeps people from using decorative stitches where a seam should be.
Which stitches should a beginner learn first?
A beginner should learn running stitch, backstitch, split stitch, stem stitch, satin stitch, whipstitch, blanket stitch, and chain stitch before anything more elaborate. Those 8 cover most starter projects and teach the hand movements that show up in nearly every other needlework style.
Running stitch is the base rhythm. It teaches even spacing and makes basting, gathering, and simple seams possible. Backstitch teaches strength and precision because it closes the gaps left by running stitch. Split stitch is useful for curved lines and dense outlines because the needle passes through the thread already on the fabric, which makes a smoother line than a stiff series of straight bites.
Stem stitch is the bridge between outline and texture. It creates a rope-like line that follows curves well, especially on floral stems, lettering, and borders. Satin stitch teaches flat fill and patience; it is unforgiving of rushed spacing. Whipstitch and blanket stitch teach edge control. Chain stitch is a classic decorative line and a practical structure for textured borders.
If the goal is only to get started with embroidery, this is the order I would choose: running stitch, backstitch, stem stitch, split stitch, chain stitch, then satin stitch. Blanket stitch and whipstitch can come right away if the project involves felt, appliqué, or visible seams.
The mistake to avoid is trying to learn 20 named stitches before understanding tension and stitch length. A tidy backstitch done at 3 mm intervals is more useful than a messy library of pretty forms. The goal is not memorizing names; the goal is controlling the needle so each hole and thread path looks intentional.
How do I choose the right stitch for the job?
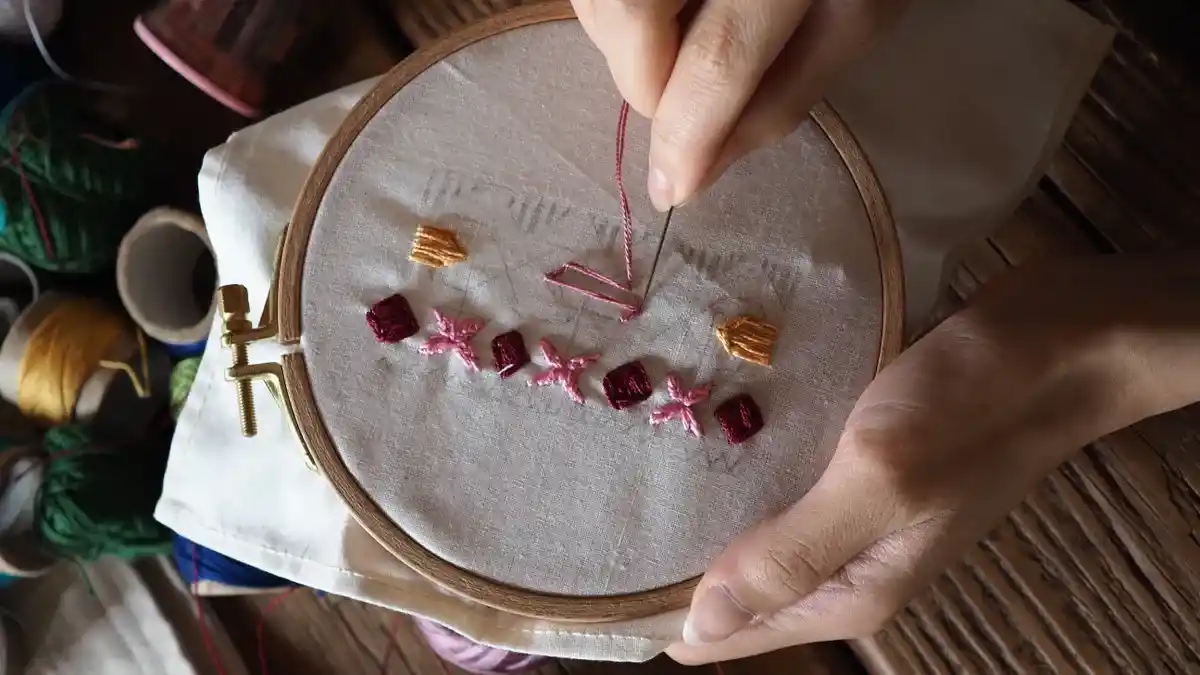
Choose the stitch by asking what the finished piece must survive: pulling, washing, rubbing, or just being looked at. The strongest answer is not always the prettiest, and the prettiest answer is not always durable.
For seams, backstitch is a strong general choice among hand stitches because it overlaps each stitch into the previous gap. That overlap gives a continuous line with better resistance than running stitch. For temporary holding, running stitch is enough and faster. For edge finishing on felt, blanket stitch wins because it catches the edge and leaves a visible border that also slows fraying. For appliqué, whipstitch is compact and predictable, while blanket stitch gives a more decorative edge.
For outlines in embroidery, stem stitch is usually the easiest curved line to control. Split stitch gives more texture and a slightly firmer edge. Backstitch gives the cleanest graphic line if the spacing stays even. For filled areas, satin stitch is the classic choice, but only when the shape is small or the ground fabric is stable. Large satin fills are prone to snagging and uneven sheen unless the underpinning is planned carefully.
The key trade-off is between speed, strength, and appearance. Running stitch is fast but weak. Backstitch is strong but denser. Satin stitch is beautiful but easy to disturb. Chain stitch is expressive but can catch on wear surfaces. Blanket stitch is useful and decorative, but its raised edge changes the look of the piece.
A practical rule: use the simplest stitch that can survive the job. A curtain hem does not need chain stitch. A monogram on linen does not need blanket stitch unless the style calls for it. Simplicity often looks more professional than overworked decoration.
Backstitch, running stitch, and split stitch: the core comparison
Backstitch wins for strength, running stitch wins for speed, and split stitch wins for smooth contour work. Those 3 cover most of the “I do not know which one to use” moments.
| Criteria | Running stitch | Backstitch | Winner for condition |
|---|---|---|---|
| Speed | Fastest of the three | Slower because each stitch doubles back | Running stitch when speed matters |
| Strength | Moderate; gaps can open under strain | Strong; the line is more continuous | Backstitch for seams and hard wear |
| Line clarity | Simple dotted line | Clean, solid-looking line | Backstitch for crisp outlines |
| Ease for beginners | Easiest to learn first | Easy after running stitch | Running stitch for first practice |
| Curves | Works, but can look broken | Follows curves neatly | Backstitch for controlled curves |
| Temporary use | Excellent for basting | Usually too permanent | Running stitch for temporary holding |
| Surface texture | Light and open | Dense and firm | Running stitch for airy effects |
| Best use case | Gathering, basting, simple decoration | Seams, outlines, durable stitching | Backstitch for structural work |
The important part of that table is not just which stitch wins. It is why the decision changes. Running stitch is the right answer when you need ease or a temporary hold. Backstitch is the right answer when the line matters after the piece is finished. Split stitch sits between them as a contour stitch with a slightly softer texture than backstitch, and it becomes especially useful when a line has to curve tightly without looking jagged.
A common beginner error is using running stitch where backstitch belongs, then wondering why the seam separates or looks unfinished. Another is using backstitch for a gather when a simple running line would reduce effort and bulk. Split stitch is often skipped because it sounds less familiar, yet it is one of the best stitches for small embroidered outlines and for anchoring chains or other decorative work.
If the project is a sampler or practice cloth, learn all 3 in one sitting. Use 8-inch strands of embroidery floss so the thread does not fray too fast, and mark parallel lines about 1/2 inch apart. That gives enough room to compare spacing, tension, and the look of each line without crowding the fabric.
When should you use satin stitch, chain stitch, and stem stitch?
Use satin stitch for small smooth fills, chain stitch for textured decorative lines, and stem stitch for flowing outlines. These 3 are the main “style” stitches, and each has a specific job that the others cannot do as well.
Satin stitch creates a flat, glossy field of thread. It is effective on small shapes such as petals, leaves, initials, or badges when the underlying fabric is stable. The drawback is obvious: long satin spans can snag, sink, or look uneven if the edges are not well defined. That is why many embroiderers use padding or a split-stitch edge under satin work. The stitch gives its best result on compact areas, not broad fills.
Chain stitch is more flexible visually. It builds a linked line that has texture, movement, and a slightly raised profile. This makes it useful for decorative borders, bold motifs, and lettering that needs to stand out. The drawback is wear: chain loops can catch more easily than flat stitches, so it is not the first choice for high-friction areas.
Stem stitch is the most forgiving of the 3. It follows curves beautifully and gives a twisted, corded line that reads well from a distance. It is one of the best choices for stems, vines, floral outlines, and script. The main risk is direction: if the stitch alternates unevenly, the rope effect becomes sloppy. Keep the needle path consistent and the angle steady.
If a piece needs a clean graphic look, stem stitch or backstitch will usually beat chain stitch. If a piece needs a bold decorative line, chain stitch often wins. If a piece needs filled color in a small shape, satin stitch is the classic choice, but only if the stitch lengths stay even and the edges are controlled.
How do I keep fabric from puckering or distorting?
Fabric puckers when thread tension is too tight, stitch length is uneven, or the ground fabric cannot support the stitch density. The fix is to control all 3, not just pull less.
The easiest prevention is to mount the fabric in a hoop or frame before stitching. A 4-inch or 6-inch hoop is enough for many small embroidery pieces, though larger frames give better support for broad fills. The goal is not to clamp the cloth into submission; it is to keep the weave stable while the needle passes through. Loose fabric invites wavy lines and uneven spacing.
Thread length matters too. A strand that is too long will twist, fray, and drag through the fabric at different tensions. For most hand embroidery, short working lengths are more manageable than long ones. Keep the thread smooth and recondition it by letting it hang free if it starts to kink.
Stitch density is another hidden culprit. Dense fills on loosely woven cotton can pull the fabric inward around the holes. Satin stitch and French knots are common offenders because they concentrate thread in a small area. Use a stable base fabric, or add backing if the project needs support.
Another useful habit is to stop every few stitches and look at the reverse side. If the back looks tight and tunneled, the front usually is too. Even tension should let the cloth lie flat without visible ridging. The stitch should sit on the surface, not carve into it.
This is where many tutorials go wrong: they tell beginners to “just keep the tension even,” which is true but not enough. Even tension starts with the right fabric choice. A loose weave and a dense stitch plan are a bad match. So is a stretchy fabric and a long satin span. Match the technique to the ground, or the ground will fight back.
What stitch works best for hems, seams, and mending?
Backstitch is a strong general hand stitch for seams, running stitch is best for temporary basting and gentle gathers, and whipstitch or blanket stitch are the practical choices for edges and visible mending. The right answer depends on whether the repair must disappear or be part of the design.
For seams that need strength, backstitch is the clear choice. It locks the thread line more securely than running stitch and holds up better in places that flex. For short repairs on clothing, it gives a neat line and is easy to reinforce at the ends. If the fabric is very fine, shorter stitch lengths help keep the repair from showing as a jagged line.
For temporary construction, running stitch is faster and easier to remove. It is ideal for basting hems, pleats, and pieces that need to be fitted before final sewing. It is not the first choice for a permanent seam unless the load is light and the fabric will not be stressed.
For turning raw edges on felt, patching visible borders, or adding a decorative edge, whipstitch and blanket stitch are the workhorses. Whipstitch is compact and unobtrusive. Blanket stitch creates a firmer edge and a more decorative finish. The trade-off is that blanket stitch takes more care to keep evenly spaced.
Visible mending deserves its own note. A repair that is meant to be seen should still be structurally sound. That means using enough passes to secure the worn area, not just pretty stitches on top of damage. A patch held with decorative stitching may look charming, but if the base fabric is still weak around the edges, the mend fails early.
The wrong choice here is using decorative stitches as if they were structural reinforcements. A chain line across a torn seam may look good, but it is not the same as a strong seam finish. Function comes first, then style.
What changes when the fabric changes?
The fabric changes the stitch choice because weave, thickness, and stretch control how the thread behaves. Linen, cotton, wool felt, and knit fabric all ask for different handling.
On evenweave linen or cotton, most outline stitches behave well because the holes are visible and the structure is stable. Backstitch, split stitch, and stem stitch are easy to place cleanly. Satin stitch can also work well on these grounds if the shape is small enough. The visible grid helps with count-based work and makes spacing easier to judge.
On wool felt, the fabric does not fray much, which opens the door to bolder edge stitches. Blanket stitch looks at home on felt, and chain stitch can be used decoratively without sinking into the weave. Because felt is dense, the needle should move smoothly and the stitch spacing should remain consistent so the edge does not buckle.
On knits, the bigger problem is stretch. A stitch that is too tight can make the fabric tunnel or deform. Hems and repairs on knits often need a more elastic construction or a lighter hand. Straight decorative fills are usually a poor choice unless the knit is stabilized. That is why many knit repairs rely on techniques that preserve flexibility rather than compressing the fabric with dense rows.
On silk and other delicate fabrics, fine thread and small stitch lengths matter. A heavy stitch can mark the cloth or leave visible holes. Less is more here. The work should sit on top of the fabric without crushing the weave.
The best stitch on paper may be wrong on the cloth in front of you. That is the real rule. Before starting, hold the fabric to the light and ask: is the weave open, is the cloth stretchy, and will the stitch need to carry weight? The answer tells you more than the stitch name alone.
What should I practice first, and in what order?
Practice in this order: running stitch, backstitch, split stitch, stem stitch, chain stitch, blanket stitch, then satin stitch. That sequence builds control from simple spacing to more demanding surface work.
Start with running stitch on a plain woven cotton scrap. Make rows with stitch lengths around 1/8 inch, then 1/4 inch, then 3/8 inch. The purpose is not decoration; it is to train even spacing and smooth needle movement. After that, do a line of backstitch with the same spacing so you can see how the stitches overlap into a continuous line.
Next, draw a curve and stitch it twice: once in split stitch and once in stem stitch. This reveals how each handles turns. Stem stitch will usually look smoother on flowing curves, while split stitch gives a firmer, slightly more textured line. Then try chain stitch on a straight line and a gentle curve so you can see how the loops stack.
Blanket stitch comes next because it teaches edge control. Use the raw edge of felt or a firm woven sample and keep the needle perpendicular to the edge. The shape of the stitch matters here more than speed. Finish with satin stitch over a small oval or leaf shape. Keep the area small, because large satin fills magnify every inconsistency.
If a stitch keeps snagging or looking uneven, the first thing to check is not the diagram. It is your tension, stitch length, and thread length. Many beginners blame the pattern when the real issue is a hand habit. A sampler exposes those habits quickly, which is exactly why it is worth the time.
The verdict: which stitches and techniques should you learn first?
Choose backstitch, running stitch, stem stitch, split stitch, blanket stitch, and satin stitch first if you want the smallest useful toolkit for most needlework projects. Choose chain stitch next if you want decorative borders or bold embroidery lines. Choose only decorative stitches first if your goal is ornament, not repair or seam work. Neither is a good starting point if you are trying to make stretch garments without stabilization or dense fills on very fine fabric.
That is the practical call. A beginner does not need a giant stitch dictionary. A beginner needs a handful of stitches that cover seams, outlines, edges, and small fills. Once those are steady, the rest of needlework opens up quickly.
The wrong path is starting with fancy stitches before learning tension, spacing, and fabric control. The right path is boring at first and useful forever. A neat running stitch becomes a good gather, a clean backstitch becomes a reliable seam, and a controlled satin stitch becomes a polished detail instead of a puckered mess.
For reliable technique guidance, consult authoritative sources such as the Royal School of Needlework and the Textile Research Centre, and for textile conservation and care principles, see guidance from the Smithsonian’s conservation resources. Those references are useful because they focus on structure, preservation, and proper handling rather than trend-driven craft advice.
When should you reconsider the stitch entirely?
Reconsider the stitch if the fabric is stretchy, the area is large, or the piece will be washed and worn often. In those cases, a different technique may be safer than forcing a favorite stitch into the wrong job.
If the fabric is knit or bias-cut, dense hand stitches can distort the shape. If the area is very large, satin stitch becomes risky because long spans snag and shift. If the item is high-wear clothing, a decorative stitch may not survive repeated abrasion, even if it looks right on day one. If the piece is heirloom-level or historically sensitive, conservation rules may also matter more than visual style.
That is where restraint helps. A stitch can be technically beautiful and still be the wrong answer. A repair that needs flexibility should not be locked down too tightly. A fine fabric should not be crowded with dense thread. A utility seam should not be treated like a sampler border.
The best needlework is not the most complicated one. It is the one that respects the material in front of you and stays in place after the first wear, wash, or display season.
Drafted with AI; not yet reviewed by a person.